
1962
Bentley S2
Ypsilanti, Michigan
Part II - Brakes and Engine Prep, Continued
 |
February
11, 2010 The backordered choke diaphragm arrived last night from Albers. Free of charge! Thank you, Greg. |
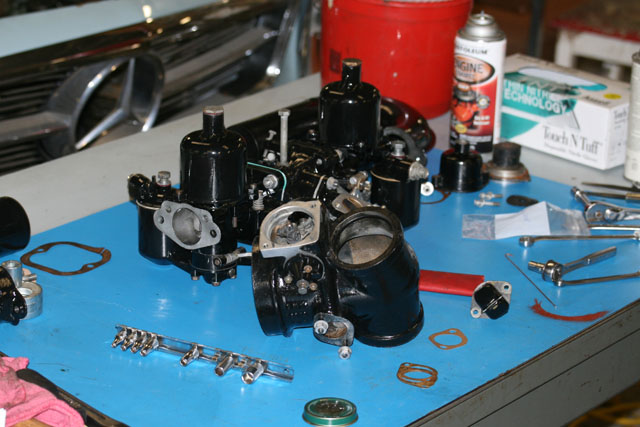 |
Dave got to work this morning installing said diaphragm and then setting the choke linkage to open the choke plate the prescribed 0.100 in. when the engine fires (and pulls a vacuum on the diaphragm). |
 |
I finished lapping the valves and installing the seals, valve springs and a new rear cover plate gasket on the Wraith head right after lunch. Speaking of lunch, Dave and I ate at one of our old haunts La Fiesta Mexicana. No Tex-Mex cheese-laden crap here - this is authentic Mexican down to the key limes and achiote. It's located at 529 W. Cross St. in Ypsilanti. Memo and Michelle will be happy to see you. |
 |
With the 1/4 BSPP-19 to 7/16-20 tube adapter in hand, Mike and I decided today was the day to pressurize the engine with oil. |
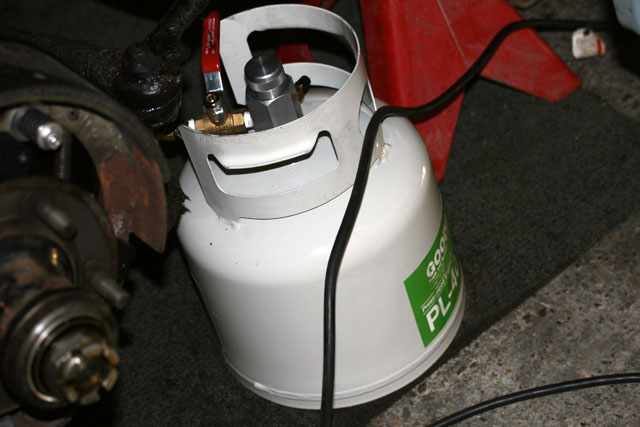 |
Simply dump 5 qts. of 5W-30 oil and pressurize to 60 psi with air. |
 |
Attach the hose and adapter to the fitting where the oil pressure sensor goes and voila' - a pressurized engine. The pushrods dripped oil on the valve springs as Mike manually turned the engine and the lifters pressurized. Once the engine is started with the electric starter in a few weeks, it will behave like a simple cold start rather than like an engine that has not been started in two decades.
|
 |
February
12, 2010 I woke up very early and couldn't sleep. Working on the car seemed a more productive than watching Star Trek episodes on the DVR. After installing some brake parts received from Flying Spares last night and then mounting the left front hub, I moved on to spark plugs - all gapped to the 0.025 in. spec. The glazed donut is from my favorite bakery and Detroit insitution, Dutch Girl Donuts. (19000 Woodward Ave., Detroit) |
 |
Spark plug installation is very straightforward because the access panels in the front wheel wells are still off the car. |
 |
New seals for the brake reservoirs were also in the Flying Spares parcel, so reassembling said reservoirs seemed like a good next step. |
 |
If you are technically-minded, delights abound when working on one of these beasts. Notice that these 2BA nuts (approx. 11/32 across the flats) have a flat side and a chamfered side. |
 |
Pete Kohnken came by today to give a hand as Dave had another "day off". His mission was to free the eccentric adjusters on the back brakes. These are used to balance the hydraulic braking force between the two shoes. This is necessary because one shoe is leading and one trailing. |
 |
Brake reservoirs installed. |
 |
The master cylinders arrived today from Apple Hydraulics. Despite the fact that the nose of each casting looks like it started to burn up during reentry from Earth orbit, the newly installed bronze sleeves will allow fault free operation. |
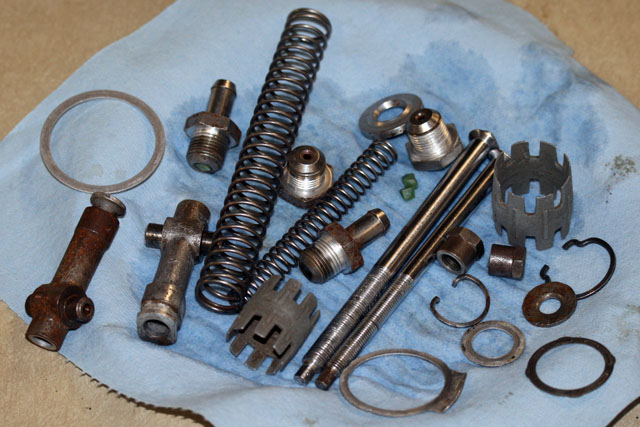 |
Today I ran the guts for both master cylinders through the tumbler. The green plastic pieces near the center of the photo are bits of abrasive media. I'm not sure if I lost it or what but there is one washer to the smaller master cylinder missing. It has small rectangles coined onto it's surface and very precise features. Ordered that bit (as part of the official Crewe seal kit) along with an o-ring for the equalizer assembly on which Dave's working from Albers. |
 |
Here's the larger master cylinder ready to go. I need to set the proper distance from the attachment point on the rod to the body before I install it in the car. |
 |
February 16, 2010 I bought a 1-3/16" gasket punch to cut an inner diameter into 1-1/2" EPDM washers to replace the sealing rings in the reservoir caps. The manufacturing process worked just fine but the design failed - material is too thick for the caps to seat. I need ~0.050 in. rings rather than 0.093. |
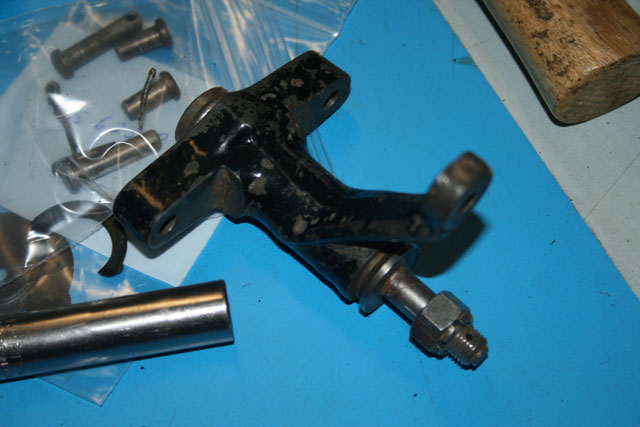 |
Dave has finished reconditioning the rear brake equalizer and it is ready to be refinished. |
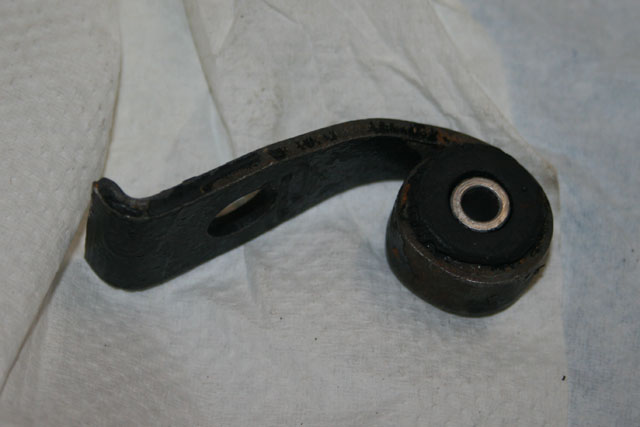 |
Dave cleaned up this piece as well. It is part of the mounting scheme for the brake equalizer. |
 |
I replaced the flexible hose connections from the reservoirs down to the hard lines. I used EPDM hose 11/16" O.D., 3/8 I.D. reinforced with polyester cord. Note: vacuum, brake and power steering lines will not work - the brake fluid will dissolve them. In other news: we returned La Fiesta Mexicana today for lunch. Co-owner Guillermo "Memo" Aleman has been enjoying our website. Turns out they too have a website. |
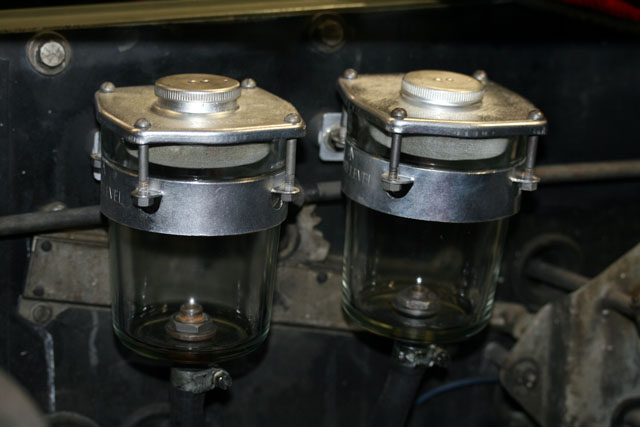 |
Here's a better shot of the reservoirs. They are now attached to the new lengths of flex hose. |
 |
Dave spent some time today cleaning and subsequently repainting the rocker covers. This is a before and after shot. The before is really not that bad. |
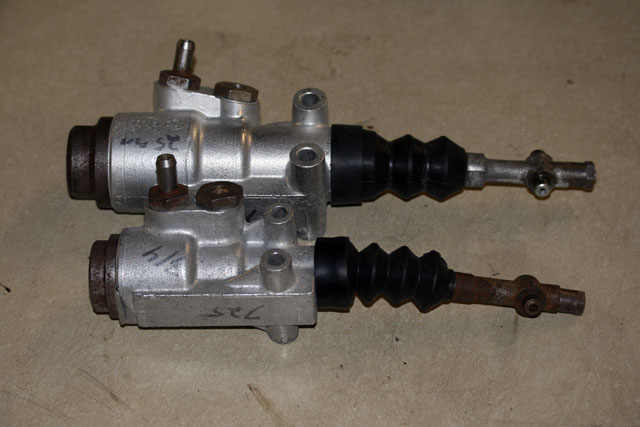 |
February 18, 2010 Didn't plan on coming to the garage today, but here I am. I assembled the second master cylinder which is the smaller one in the foreground. |
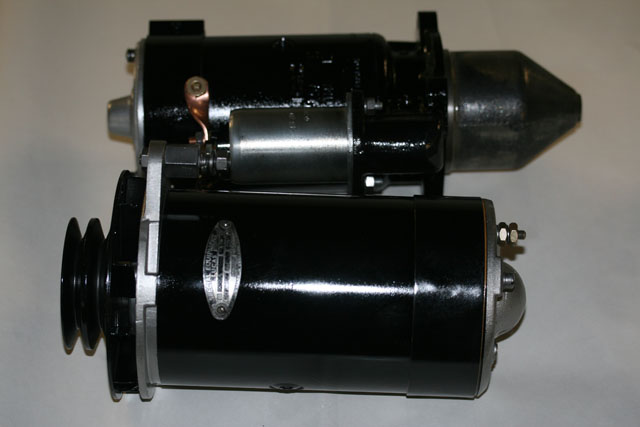 |
Picked up the completely refurbished starter motor and generator from Ted's Auto Electric in Ypsilanti. |
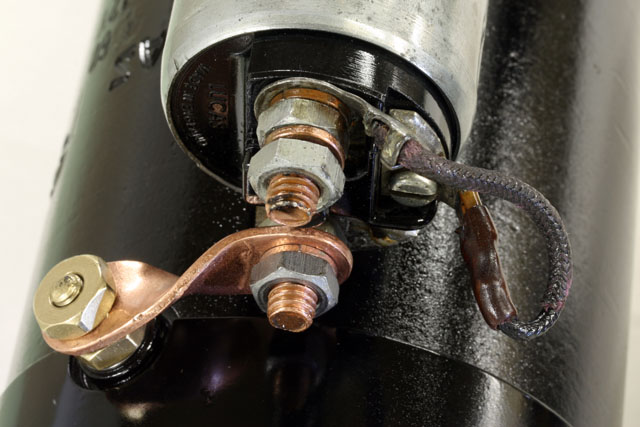 |
You definitely get what you pay for. All of the details bear close scrutiny. Now I just have to get the rest of the car to look like this! |
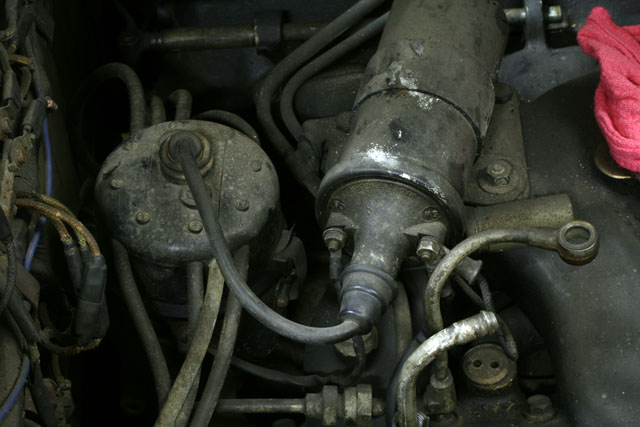 |
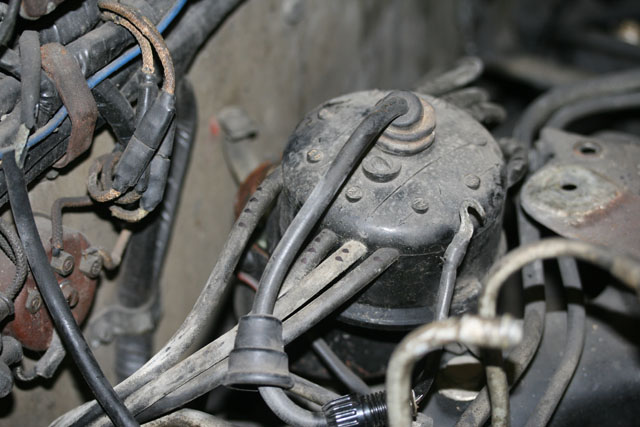
Took some photos of the orientation and setup of the coil and distributor. The plan is to clean these items along with the lower intake and also rewire the "H.T. leads". |
 |
February 19, 2010 I spent the morning blowing out all of the hard brake lines with compressed air and tightening all of the connections. This is the flex line at the back axle. I couldn't quite get the slack in the flex line point in the desired direction, it kept flopping on the leaf spring which would cause all manner of chaffing. I happened to have a small aluminum washer of the precise size to shim the connection causing it to tighten about one flat (60 degrees) sooner - perfect! |
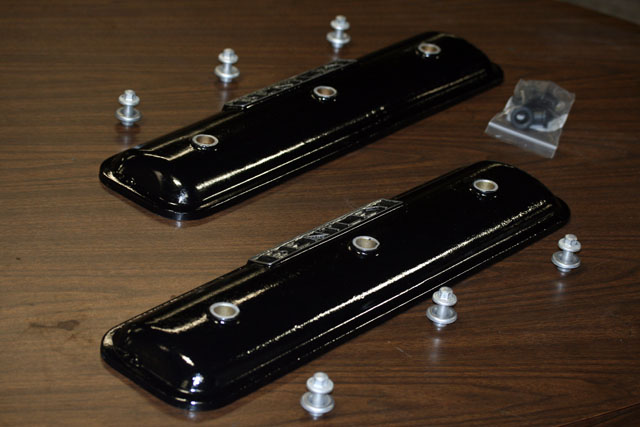 |
These are the valve covers that Dave has restored. He spent the morning painting a number of items in the mechanical side of the brake system. Dave and I met our friends Mike and Roy at lunch. Roy got to talking about the Zenith carburetors on his Isotta-Fraschini and we decided that a field trip to Jackson County was in order to assess the situation. Dave volunteered to fine tune the set-up so that she will be purring for her trans-Atlantic trip to Italy in the Spring of 2011. |
 |
Yeah... I think we'll call today a snow day. |
 |
February 23, 2010 Dave and I spent quite a bit of time today removing the ignition looms. |
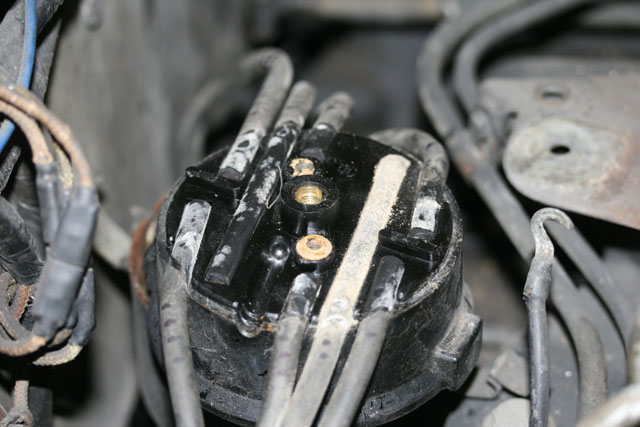 |
The distributor end is easy with the old-style distributior cap. Unthread the coil wire and remove the screws and then pull the wires from the contact spikes. |
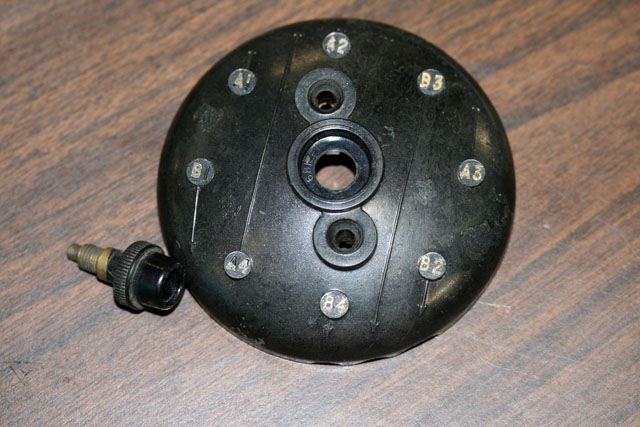 |
Cleaning the lid reveals the white cylinder lettering still present on the lid. |
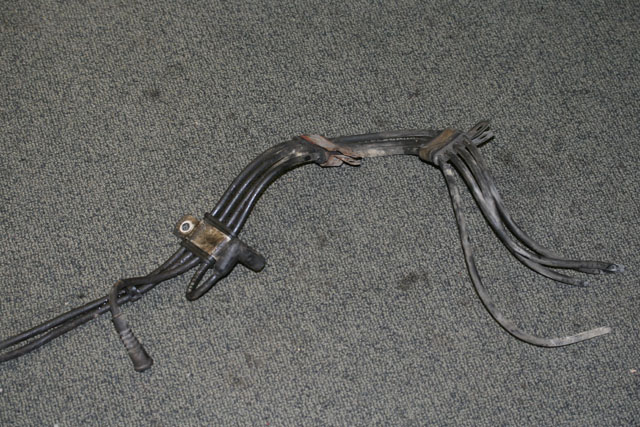 |
A-side (shown) was fairly easy. B-side took most of the afternoon due to the placement of the power steering hoses. I finally decided to cut it. The new B-side will be assembled in situ. |
 |
February 24, 2010 The new, correct fuel pump diaphragms arrived from XKs Unlimited last night. Dave immediately resumed working on the fuel pumps when he got in this morning. |
 |
Braking force supplied by the servo is distributed to each of the two master cylinders with this equalizing linkage. Each side has 23 needle bearings. I cleaned all of it in kerosene and repacked with fresh grease. |
 |
After dining at Seitz's Tavern (110 West Middle Street) in Chelsea, Dave, Mike and I picked up the brake drums at Dexter Manufacturing. The braking surfaces were turned as can be seen through the hub holes. The cosmetic surfaces were blasted with carbide media. |
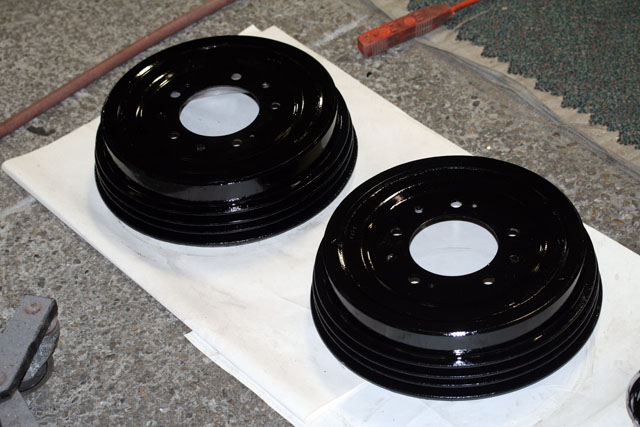 |
I immediately painted them with POR-15 upon our return to the garage. I will have to touch up the drums tomorrow yet, but we will have wheels on the car very soon. |
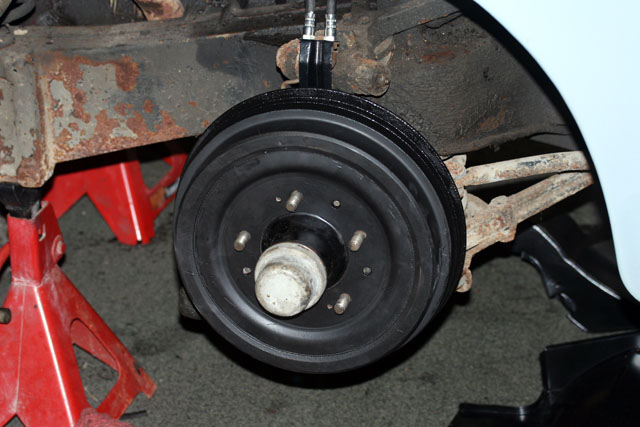 |
The paint dried to a satin finish overnight and then I touched up the fin areas (thus wet and shiny in photo). Since the fins won't touch anything, I went ahead and installed the drums followed by the wheels. I haven't centered the shoes yet but this can't happen until the system is filled with brake fluid and bled. |
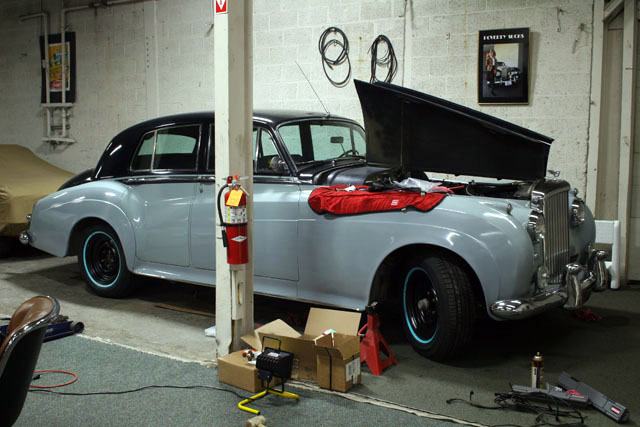 |
At long last, the car is off of the jack stands and can be wheeled over to the lift if need be. |
 |
Having the car at a normal height makes it much easier to work on top of the engine. Dave reinstalled the thermostat housing (not shown) and the valve covers. This will enable cleaning of the lower intake tomorrow without any detritus entering sensitive engine areas. After that, the generator, coil and carburetor assembly can be installed. |
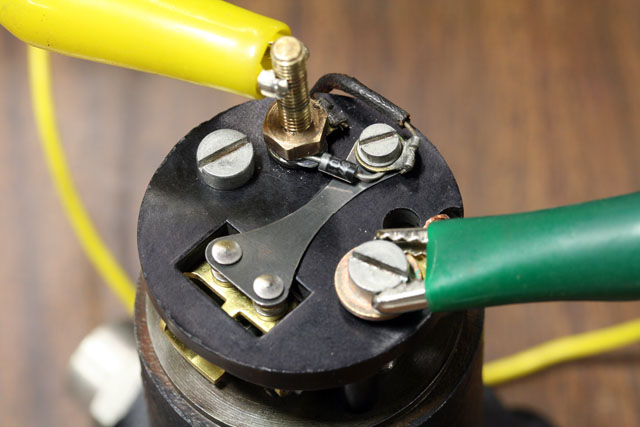 |
February 26, 2010 Gary Phipps wrote a little sidebar in the RROC's Flying Lady magazine (2007-3, p. 8519) on using a 1N4001 diode rather than the supplied capacitor to limit flyback voltage and prolong the life of the points. I wired in the diode (cathode end towards the positive terminal) accordingly. Also tested this end of the pump using a regulated power supply. It works like a champ. Dave will mostly likely build up the other end of the double-ended pump Monday. (He took today off.) |
 |
I spent the afternoon brushing off and vacuuming peeling paint from the lower intake manifold and also installing the power steering belts (not shown). Unfortunately, I ordered the wrong generator belts. Anyone need a set of generator belts for a non-air conditioned Cloud or S type? The part number is RH 9263. A parcel post from Albers arrived this afternoon which means I can finish assembling the small master cylinder next week. |
 |
Dave finished up the other end of the pump today including the "Phipps Diode Modification" and we tested the whole thing electrically. All set to go.
|
 |
I spent most of the day fabricating and installing a new set of ignition wires. To do the ignition properly, you need to purchase 30 feet of Packard 440 7mm ignition wire. You really only need about 26 feet, but it's much easier to cut the lengths a bit long and then trim everything at the distributor after the looms are installed and precisely positioned. |
 |
March 2, 2010 After installation, each ignition wire was tested for continuity. This also verifies that each wire is going to the correct spark plug. You can also see the coil and condenser that Dave C. refinished and put back on the engine yesterday. |
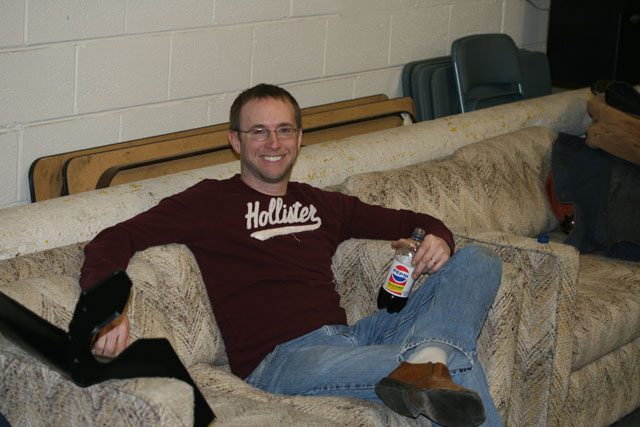 |
Dave Cunningham took the day off today but my "Backup Dave", Dave Hollister happened by to help. You may remember Dave H. helping to remove and replace the engine in the 1939 Wraith. Hollister's first assignment was to reinstall the oil pressure sensor. Right off the bat, he found a 5/16-24 nut that Cunningham and I spent about an hour looking for yesterday afternoon. |
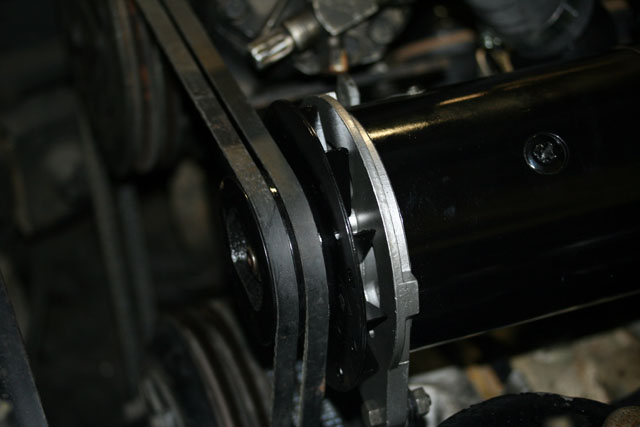 |
After we failed to purchase the correct belt needed for the A/C and generator loop at Grainger, Dave H. headed out solo on a wild goose chase looking for said 25/64 x 66-5/8 in. belt. He ended
up at the NAPA distribution center near Detroit-Metro Airport (DTW)
in Romulus with a Gates 7660 (NAPA part no. XL 25 7660). It fit perfectly. |
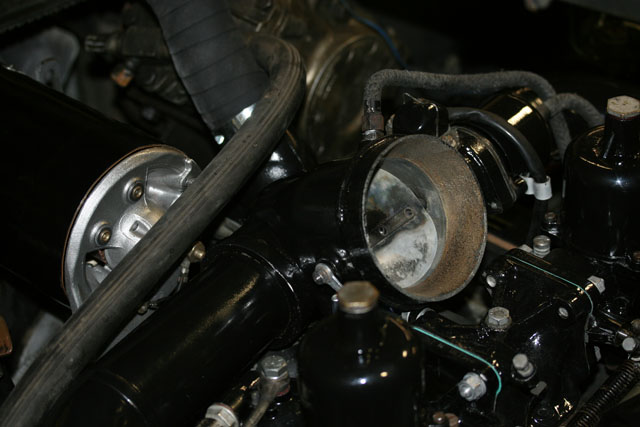 |
With apologies to Dave C. who spent weeks overhauling the carburetor and choke assembly, Dave H. and I installed it on the engine today. All of the fuel, electrical, mechanical and heated air connections were made without any casualties. We're getting very close to an attempted engine start. All that is needed now is to install the fuel pump and starter motor, fill the radiator and put some fuel in the tank.
|
 |
Another milestone: the car is on the lift for the first time. |
 |
This made installation of the overhauled starter motor a snap. |
 |
Dave C. installed the brake rods and equalizer. |
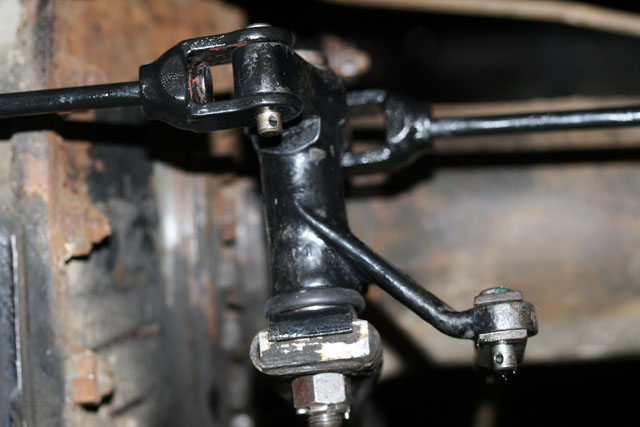 |
Here's a close-up of the equalizer. |
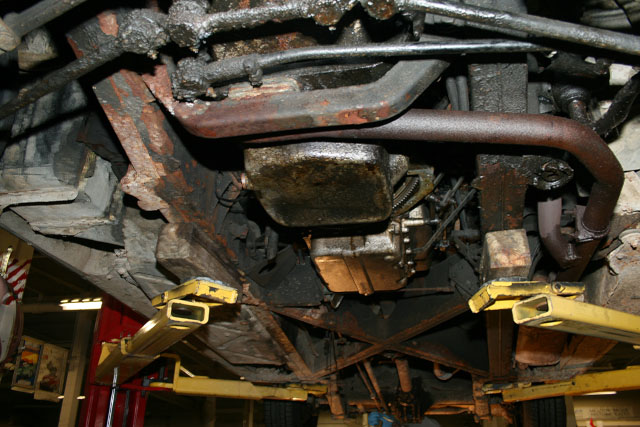 |
Here's a general view of the "greasy side" from the engine sump back to the differential. The plan is to install the fuel pump and work on the master cylinders tomorrow and see if she'll fire up on Friday. |
 |
March 4, 2010 Dave C. painted the chassis frame in the area where the fuel pump is attached and then installed the fuel pump after our lunchtime excursion to Silvio's Organic Pizza in Ann Arbor. Dave H. installed the flexible EPDM lines that will connect the two master cylinders to the system (not shown). Meanwhile, I connected the starter motor electrically and torqued the mounting screws to 30 ft-lb. The starter motor turns the engine and the fuel pump is working in situ. That means tomorrow will indeed be the big day! |
 |
With six gallons of fresh gas in the tank we ran the fuel pump until it filled the float bowls. All systems go, except no spark. After fiddling around with the ignition for about 30 minutes, we had a very successful start today. The main culprit was corroded points that needed a pass with some emery cloth. We also adjusted the coil connections slightly to further reduce resistance in the primary circuit. |
|
Click on the play button in the image at left to watch the video. We have good oil pressure, almost no lifter noise (one comes faintly in and out), no blue or white smoke, minimal blow-by through the draft tube, a functional thermostat and 60 deg F drop across the radiator. All of the gauges work including the tach. One minor glitch: cylinder A4 is not firing. We'll track that down next week. On to the brakes. |
|
 |
To be sure that the brake reservoir flexible hose I ordered is indeed up to the task, I am soaking a small sample of it in DOT 3 brake fluid. |
 |
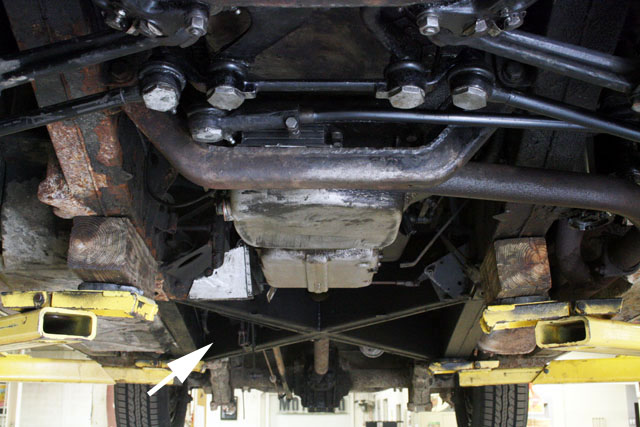
Cunningham has been busy cleaning the frame. As you can see left center section of the frame (right arrow) is already repainted. The front engine mount (left arrow) is worn out and delaminating. The plan is to address that tomorrow. Note how the steering linkage at the top of the photo is caked in grease and Ohio clay. |
 |
March 9, 2010 Dave continued work on the frame, this time on the right side in the area where the master cylinders will go. I worked out a neat trick to replace the front engine mount. Since the new mount is slightly less thick than a 2x4 and offset to one side, one can loosen the old mount, raise the engine an eighth of an inch with a pry bar, slip in a small 2x4 segment and then swap the old mount for the new one. At the top of the photo, you can see the steering linkage once again appears as new. |
 |
Flying solo today, so I decided to do some bench work. The needle bearing balance lever sandwiches in the brake operating lever assembly. |
 |
However, the trunnions on the ends of the master cylinders have to be captured simultaneously on the ends of the balance lever. This makes it a bit of a handful because it's very easy for a few of the needle bearings (46 of them) to drop out when the pivot pin is temporarily removed to slide everything in place. Mike and I had lunch at Sze-chuan West in Ann Arbor. The building used to be a night club back in the day and the interior is done up like a cave. One of my favorite Chinese food eateries in Southeast Michigan. |
 |
One of the other guys was using the lift to work on his Alfa this afternoon, so I decided to treat the leather with Leatherique Rejuvenator Oil. I'm not certain, but I think the Rejuventor Oil is made from foot sweat and vegetable oil. But it works. The product seeps into the pores of the leather and pushes all of the crud out while strenghtening and softening the leather. When this dries to a white haze it can be wiped from the surface with Prestine Clean. |
 |
I am looking forward to spending some quality time behind the wheel wooshing down the road... Did I mention that the original AM radio still works? |
 |
March 11, 2010 I painted the right middle section of the frame today. Since this is where the master cylinders go, the installation of same can begin tomorrow. Dave C. took a sick day today. The leather sucked up yesterday's application of the Rejuvenator Oil so I applied a second coat before wrapping things up early. |
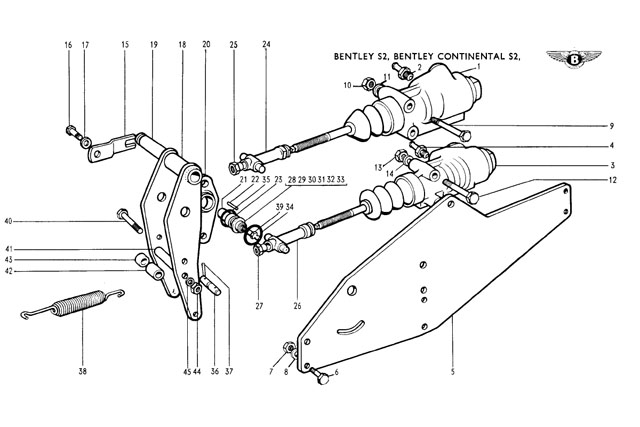 |
March 12, 2010 Dave C. was out sick again today. He got a cold from his granddaughter. It took me all day minus a lunch break with Roy at the Sidetrack, but the master cylinder assembly and rear brake intermediate linkage are installed. At left is the Master Cylinder assembly which I had partially assembled on the bench Wednesday. |
 |
There's an additional level of complexity in the form of the rear brake intermediate linkage which actuates the mechanical linkage on the rear shoes. (You will recall that the rear shoes have both hydraulic and mechanical actuation.) The handbrake is also connected to this system at the bottom of lever 1. The handbrake cable had been cut at some point for reasons unknown. Silver Cloud owner Bob Cowley is on his way here from the UK and he is bringing me a new cable from Flying Spares. |
 |
Here's how it all looks amidships. That's alot of stuff. Adding brake fluid will have to wait until Monday but the mechanical aspect of the rear brakes is functional now. As a result, another milestone: I backed the car away from the lift under its own power. It appears that both reverse and first gear are functional. The rest remain to be tested on the road. |
 |
I came in Monday fully expecting to fill the reservoirs with brake fluid and then vacuum bleed the brakes. The bottom reservoir steadfastly refused all attempts to bleed or even pump fluid. Dan Docherty suggested I take out the reservoir and bleed it on the bench. That didn't work either! After some head scratching, it turns out I built up the assemblies of BOTH master cylinders with the input and output connections transposed. ARRRRGH. I spent most of Tuesday removing, correcting and replacing the master cylinders. Hopefully tomorrow will be the day for bleeding the brakes. |
 |
March 17, 2010 Finally bled the brakes properly this morning with a Mityvac vacuum bleeder. With the master cylinders functioning, I could then apply pressure to the front brake cylinders whose mountings I left purposely loose back in early February. This allowed the cylinders to center equally against the brake drums. After carefully removing each brake drum the hardware is tightened and each brake shoe will be doing an equal amount of work. |
 |
With sunny skies and mild temps, a road test seemed in order. I drove the car outside up and down the street a few times. The transmission made timely shifts through all four gears and the brakes operated smoothly with proper servo assistance. There appears to be some judder while accelerating in third and fourth and the downshifts are a bit late while coming to a stop. While all of this was going on, I did not realize the car was also hemorrhaging brake fluid. You can see the evidence now covered with sawdust on the garage floor. |
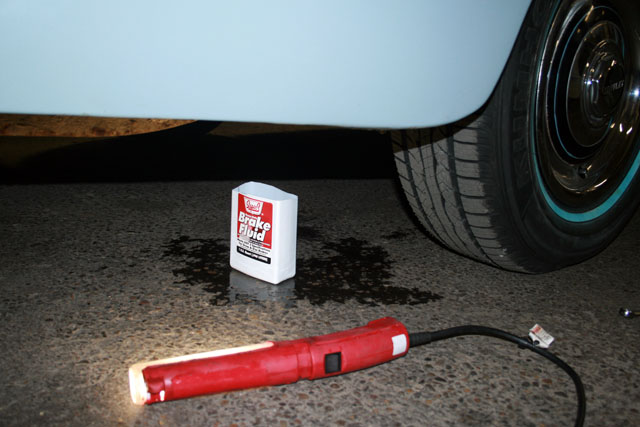 |
The reservoir to the upper master cylinder circuit was half empty and a puddle of brake fluid collected behind the right rear wheel. |
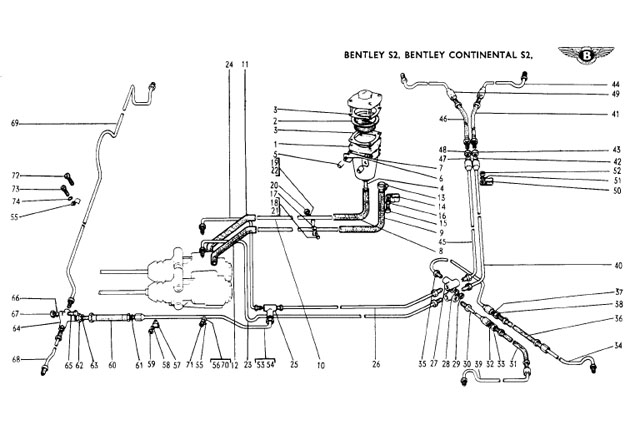 |
Turns out pipe 53 burst near flexible hose 60 just past where it passes over the rear axle. I will need to fashion a new one out of bundy tube on Friday. On a separate note, I think the valve stem seals are tired, which is not a huge surprise. I'm going to help Rick Barrett with his Derby Bentley engine tomorrow, hopefully I will capture some interesting photos to share. |
 |
I went over to Rick's garage and removed the pistons from his Derby Bentley engine that I had installed about a year ago. You may recall we stopped work on this engine for the season. One thing we did not do was to ensure that each piston assembly weighed within 5 grams each other. We removed and measured them today. They were 9 grams apart, so Rick is going to send them out to be balanced. |
 |
March 19, 2010 Back to the S2, Dave noted that the wiper blades were shot. Turns out that there was a nice new flexible set with identical specification that came with the car sitting in the trunk. |
 |
I really didn't feel like fixing that burst brake line today so with the car on the floor, Dave went crazy buffing out the paint while I removed the Rejuvenator Oil residue from the interior leather surfaces using Prestine Clean. I also removed all of the vintage Juicy Fruit gum wrappers from the ash trays in the back seat. |
 |
Dave still has the roof and the boot lid to buff, but the difference is immediately obvious. |
 |
In a burst of late afternoon activity, I cut the air trunk to length and installed it and the filter box. Now that I have the length correct, the plan is to paint it black. Why go with the crazy green tube and paint, you may ask? The Crewe Genuine Part goes for a little less than $500. Yeah, that's what I said. |
©2009-2010,
Sherbourne Mews, LLC
Click here to contact the webmaster.